Here is collection of links with free stencils for glass painting. I have not used any of them to create my glasses, but some of them inspired me :)
For beginers or kids
http://www.warner-criv.com/patterns.aspx - a lot of very simple patterns, flowers, animals, clowns
http://www.glasscrafters.biz/CTGY/pat_fr
https://blogger.googleusercontent.com/img/b/R29vZ2xl/AVvXsEhoHYfO8sExni4FWSCR6boMWZoOGyfAQwftbzekzB6fyCSioTvdIWkn3UJdFQ6-CbS4L-YOT9p938ddhRpSOYLTn5Dng-CeVT6XOEZXlPLI3mYab22UTOThhOWzdvQ8SGU1Qft5tFmkidoG/s1600-h/an11.gif
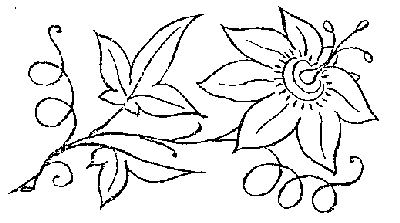
Some flower and fruits patterns:
http://img-fotki.yandex.ru/get/5403/cem-cema.5f/0_3826b_e3baf639_orig.jpg
http://img-fotki.yandex.ru/get/4800/cem-cema.5f/0_3826c_33782a96_orig.jpg
http://img-fotki.yandex.ru/get/5400/cem-cema.5f/0_38271_1710f83f_orig.jpg
http://img-fotki.yandex.ru/get/4803/cem-cema.5f/0_38272_e6c1614a_orig.jpg
http://img-fotki.yandex.ru/get/5401/cem-cema.5f/0_38273_a00888a3_orig.jpg
https://blogger.googleusercontent.com/img/b/R29vZ2xl/AVvXsEjJjhE1xWtldxubCk0MrmFoXJvIZ77Mab4VEOjLSwJX0x9x_t9GdxwXlz6c-wVBhLplOVzWivegwS4-UptOunjbhm0PYmzBW3IJWMT8KaZO6uhL5zHrhR9kdfN4bVyuIzpZtgYejQo52SJ9/s1600-h/rose_3.gif
https://blogger.googleusercontent.com/img/b/R29vZ2xl/AVvXsEhebl7gcjWlZFibuMh6B4wN7sv8Mn0OB7V-oDm31DeUT3q4J09WafOcyFxfj1_YKJG8BZVrFCCrWcrbo_-h0KYIhmdHtyEs27yD7QAqWVANrIJ3_Wa1RxXndorhpxIDHkFMbA4PcqaE3YDL/s1600-h/4fruitdragonflyfull.jpg
http://www.your-decorative-painting-resource.com/reverse-glass-painting.html
Celtic
http://www.glasspainting.co.uk/free_designs/designs/main.php?g2_itemId=359
Zodiac
http://www.glasspainting.co.uk/free_designs/designs/main.php?g2_itemId=417
Suncatchers
http://www.glasspainting.co.uk/free_designs/designs/main.php?g2_itemId=446
http://chantalstainedglass.50megs.com/1suncatchers1.html
http://chantalstainedglass.50megs.com/1suncatchers2.html
http://chantalstainedglass.50megs.com/1suncatchers3.html
http://chantalstainedglass.50megs.com/1suncatchers4.html
Windows and Panels
http://www.glasspainting.co.uk/free_designs/designs/main.php?g2_itemId=505
http://chantal-stainedglasspatterns.com/2patellinacorrugata.html
http://chantal-stainedglasspatterns.com/2psychedelicsixties.html
http://chantal-stainedglasspatterns.com/2miscellany.html
A lot of artworks, flowers, patterns, etc. For more experienced users
http://free-stainedglasspatterns.com/1set02.html
Lampshades
http://chantalstainedglass.50megs.com/1lampshades1.html
http://chantalstainedglass.50megs.com/1lampshades2.html
http://chantalstainedglass.50megs.com/1lampshades3.html
http://chantal-stainedglasspatterns.com/2ceilingshade01.html
http://chantal-stainedglasspatterns.com/2ceilingshade02.html
http://chantal-stainedglasspatterns.com/2ceilingshade03.html
http://chantal-stainedglasspatterns.com/2ceilingshade04.html
http://chantal-stainedglasspatterns.com/2ceilingshade05.html
http://chantal-stainedglasspatterns.com/2ceilingshade06.html
Boxes
http://chantalstainedglass.50megs.com/1projects2.html
http://chantalstainedglass.50megs.com/1projects1.html
Showing posts with label box. Show all posts
Showing posts with label box. Show all posts
Thursday, September 13, 2012
Wednesday, September 21, 2011
Orange Box
I found master class on how to make this box long time ago while surfing the internet. I don't know who was the first invented how to make small boxes from oranges. This is useless but totally organic (except acrylic paints). So if you have time, wish to paint something and have an orange you can do such box:

First of all you need an orange. Cut it and eat it. Then put halves of orange skin in boiled water and add two table spoons of baking soda. Left it for 12 hours

Now your orange skin is really soft so you can put it over glass and fix using rubbers and let it dry a week or two. After two weeks you'll get two halves of your future box
Now it's painting time. I chose India patterns because I want to practice to paint them for a long time.


Thursday, August 26, 2010
Shabby Chic Cake Box
Today we are going to create box in shabby chic style. This box looks like most delicious cake you have ever tried but have no calories:-) One more bonus: this cake will be good for years.


- nubby velour;
- polyester batting;
- carton;
- corrugated carton
- lining cloth
- fabric
- glue (transparent), multi-purpose glue
Preparing carton base. Cut from corrugated carton two circles (diameter 7,5 inches) and 4 strips (two - one inch wide and 2 - 1.8 inches wide). Remove one top layer from strips (the one without lines).

Put two plates together using multi-purpose glue and paper strips. Fasten sides by strips we removed before.

Covering base by fabric. Сut out circle from sheeting (diameter 7.5 inches + some extra space for seam 0.1), 2 stripes (wide 2,8 inches and 3.2 inches, length - 26 inches). Sew down parts of cake's bottom and cover carton on top as its shown on picture


Preparing "cream". Cut off tree circles. One - from white paper, diameter 7.5 inches; one polyester batting circle - diameter 7.8 inches, and one circle from pink fabric, diameter 8.3 inches. The fabric should be elastic. Sew cloth to of cake bottom and velour.

Decorate your cake using roses, flowers, etc. You can prepare it using cloth scraps.


Stuffing cooking. For "stuffing" you need two circles cut off white carton, diameter 7 inches. Also cut off strips, width is 2 inches. If your carton is not white in addition you should use white paper. The same details should be cut from polyester batting. Take a lining cloth and cut off strip 4.3 inches wide, and two circles - diameter 10, 2 inches. Sew out carton parts with cloth putting under it polyester batting.


This master class was originally prepared by Galina Maximova, you can find it here. Also check out Galina personal page and blog - you can find more lessons and crafty creations from Galina.
Subscribe to:
Comments (Atom)