Thursday, February 24, 2011

Broken Stool = Mosaic Table

There was the following stuff, to be honest some kind of garbage:
1) broken stool without a top
2) cut circle from table top
3) some Polymer Clay circles-flowers
4) two ceramic tiles - white and light blue
5) rods
But if we put everything together.... we can have perfect stylish mosaic table:
All steps of this transformation you can find on the picture below. First of all attach circle from a table top to the stool. Scratch table top and cover it with tile glue. Put on the glue polymer flowers and pieces of tiles. Before you start putting mosaic on glue put it together on the another table. Glue is drying fast so you have only about 15 minutes to transfer your mosaic from one place to other. If you don't use ceramic tiles you can use which best fits your material. When done with mosaic, efface the surface and cover it with oil based finish twice.
Next steps are not required, there is the place for you fantasy and view of your future table.
Take piece of bagging and remove some threads from it. Attach it to the ex-stool. Curve rods and nail it.
Add paper-mache roll to the table edge. Cover everything with bronze spray painting. Put some craquelure and cover everything with black painting. Now you have nice bronze cracks. Cover places you painted with water based finish.
Here is more detailed picture of table stands:
Thanks gashula for sharing this master-class with us. By the way she also makes nice handmade dolls that can be found in her blog. 
This master class was originally posted here.

Wednesday, February 23, 2011

Cabinet for toys

One more furniture renovation that I really like. There was old and boring cabinet and there was no money for new one as well as no place for storing kid's toys. But if you have taste, some time and some painting skills, you can have perfect cabinet that looks better than new one. So here is "before" picture: 
 And here is "after" picture:
Looks way better, doesn't it?
This renovation was done by asa-asa and originally posted here

Thursday, February 10, 2011

Creative and environment friendly handmade gift for Valentine's day

You can do such unusual creative and environment friendly gift for your honey using old bulb.
Materials and instruments:
1) Old light bulb
2) piece of wood
3) wire
Step 1. Open base of bulb and remove contents.
Step 2. Make hearts from wire:
Step 3. Using glue attach bulb with hearts to piece of wood and write down a love expression.
Your cute and funky gift is ready. 
Source: idecorator.ru

Wednesday, February 9, 2011

Handmade valentines: make it by your own hands

St. Valentine's Day is on next Monday, but it's still more than enough time to create very special valentine for your very special one. Below you can find some ideas and "how to's".
First idea - box with the kiss. For the laziest ones. Take any nice small or big or even huge box. Decorate it with harts, or kisses. If you are the lazy champion, you can just buy nice red box, if not you can cut out hearts, flowers and kisses, buy a lot of small valentines and attach them to the box or buy ready heart shaped stickers and put them to the box
Thats all for this idea. After preparing your box you should come to you Valentine, open box, kiss the air in the box and quickly close it. Your present is ready:) Give it to your sweet hart.
Next idea - Be My Valentine garland:
Step by step instruction you  can find here.
Next idea - aromatic valentines made from salt dough.
 
 
To create such cute valentines we need:
- cup of flour
- 1/3 cap of salt
- 1/2 tbs of corn starch 
- hot water
- fragrance oil
- food color
Mix water and food color. Add water to mix of  starch, flour and salt. Brake dough with fragrance oil. Sculpture anything you like (for Valentines day it's probably should be hearts) and put it to the dry and warm place. Let them dry for couple days and then put them everywhere. 
I like pop-ups cards a lot. So here are couple ideas for them.
If you like these pop-ups you can find how to make them here. There were simple ones. The following requires a way more time and a little more skills but they are really gorgeous:


The templates for these cards you can find below. The larger size is available after click on the picture.


That's all for today. I'll continue tomorrow:)

Thursday, February 3, 2011

Miniature glass figurines - 3

Here and here I already posted some of my miniature glass figurines, but after all holidays my collection has grown and I have couple more cute miniature animals.
Dragon:
Frog #1
Cute pink pig:
Bluebird of happiness
Frog #2 (frogs figurines bring money in your life by feng shui so more frogs more money:))
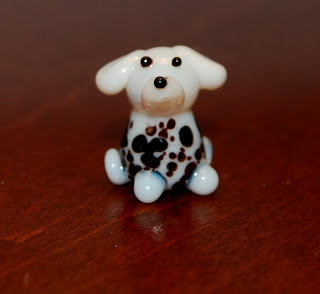
Just dog, but I like him:)
Orange parrot
Green turtle
and white rabbit:

Wednesday, February 2, 2011

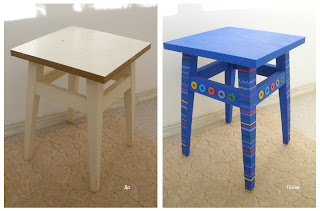
Blue Handpainted Stool

I have not been here for a while as well as I did not post any "how to's". But I'm back and today I would like to show you how to create such a beautiful blue stool. Here are before and after pictures. Amazing, isn't so?

Let's start. Take old and ugly stool:

Next - remove old finish and painting using sanding paper or sanding machine, clean up stool and paint it. Acrylic blue painting was used in this case. You need to put couple layers for brighten and smoothen color.
Now we need to add some decorations. You need to buy some shims and paint them.

Add some patterns to the stands and attach shims using silicone glue or any other adhesive for metal, plastic or wood.  It's better to use transparent glue. That's all: 

Using this approach you can decorate anything in your home, and make it stylish and full of art. 
I would like to say thanks to lendigoo for creating this tutorial and sharing it with us.